
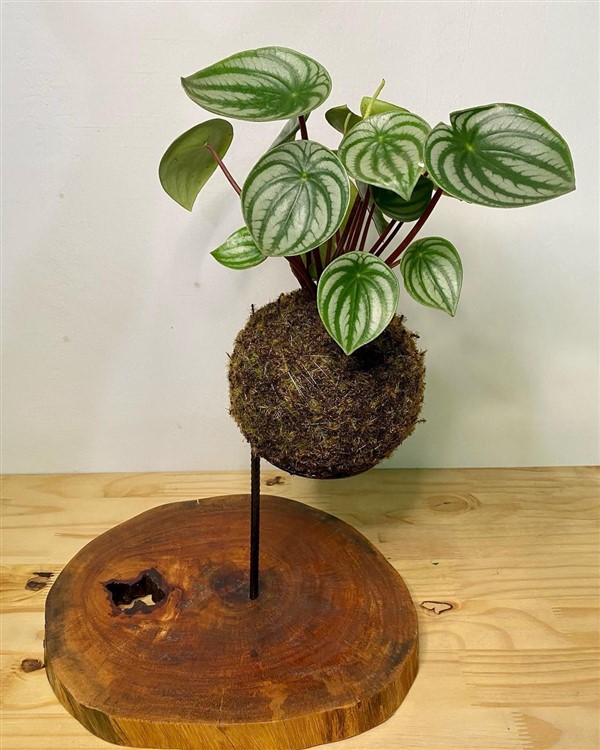
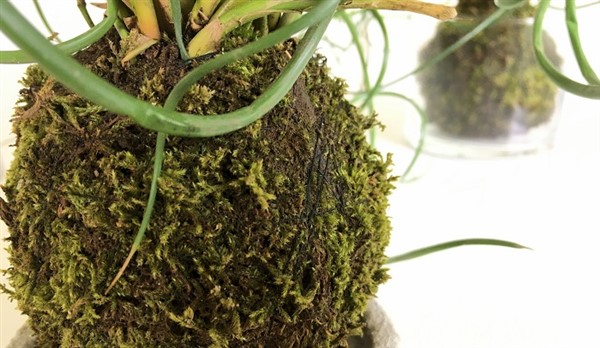
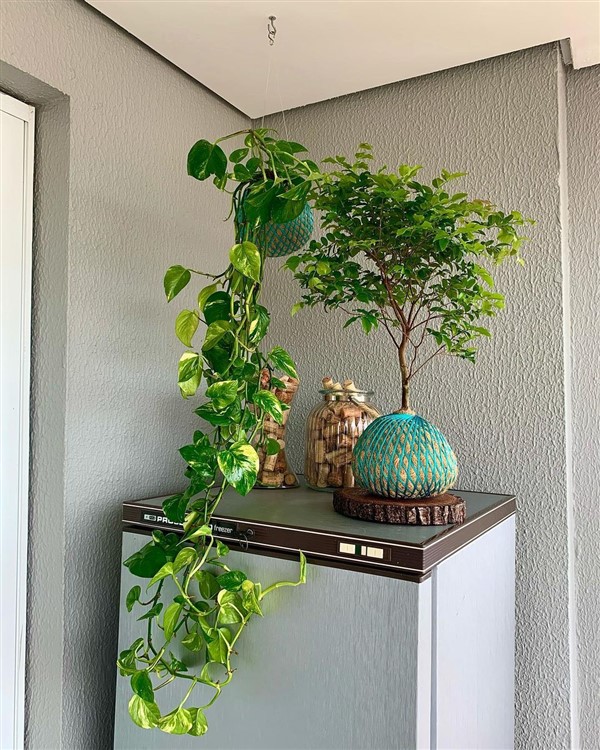
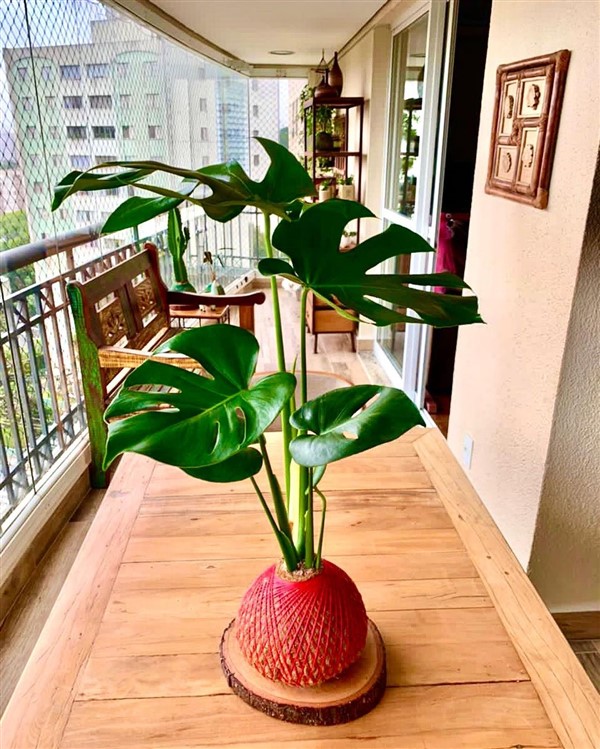
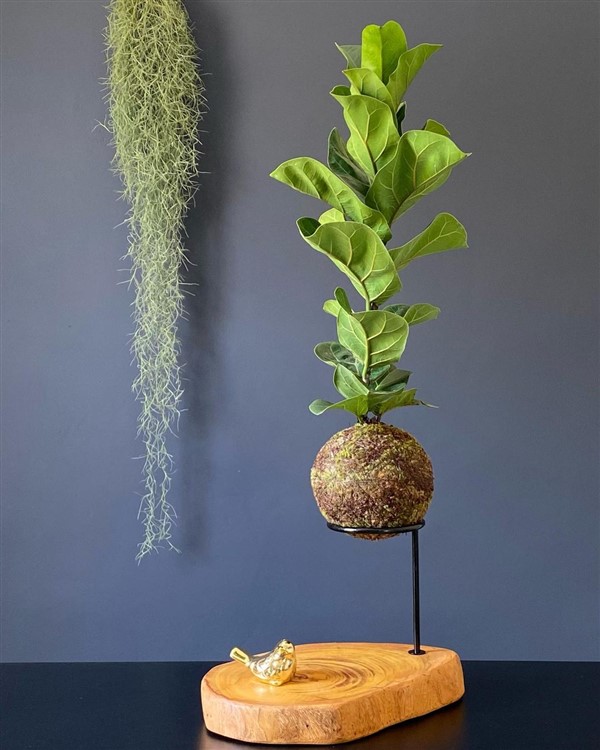
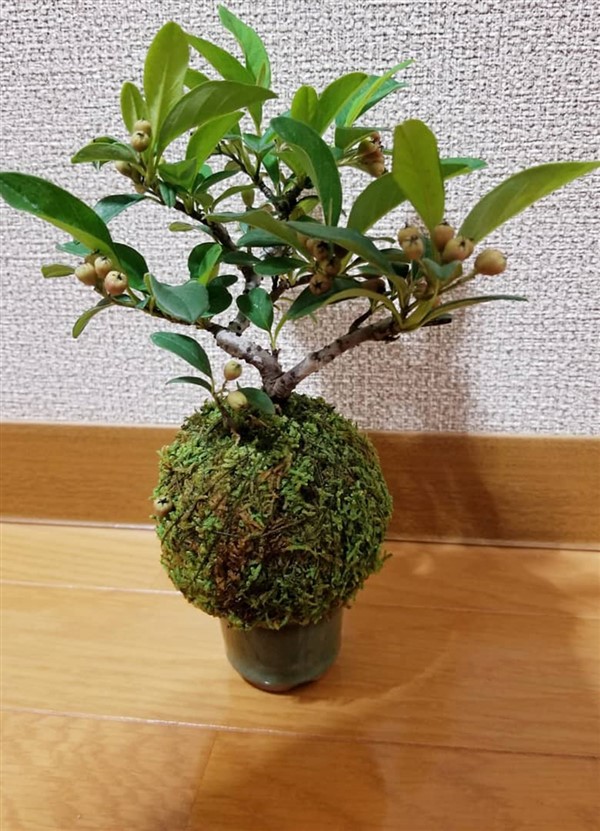
Kokedama, which literally means “moss ball” in English, is a soil sphere covered in moss. Originally from Japan, the idea is used to grow ornamental plants. It is a combination of multiple Japanese styles such as bonsai and kusamono. The trend works well in both Japanese-style and modern settings. You can enjoy decorating moss balls by placing them on a plate or vase, out on your balcony, hanging them just like macrame plant hangers, or arranging them because they are not planted in pots. They are independent!


Kokedama is another DIY idea that uses moss, like a moss pole. Works best with houseplants such as Fiddle Leaf Fig and Watermelon Peperomia. (More on that later!).
Making Kokedama moss balls is a fun, family-friendly, and therapeutic craft that allows you to demonstrate your love of plants while also creating a unique display. So why don’t you try making your own Kokedama? We will guide you thoroughly in this post.
DIY Kokedama Balls
There are DIY Kokedama kits being sold that you may find from your local home supply store which makes the material gathering process way easier! Also, you can gather your own.
Materials
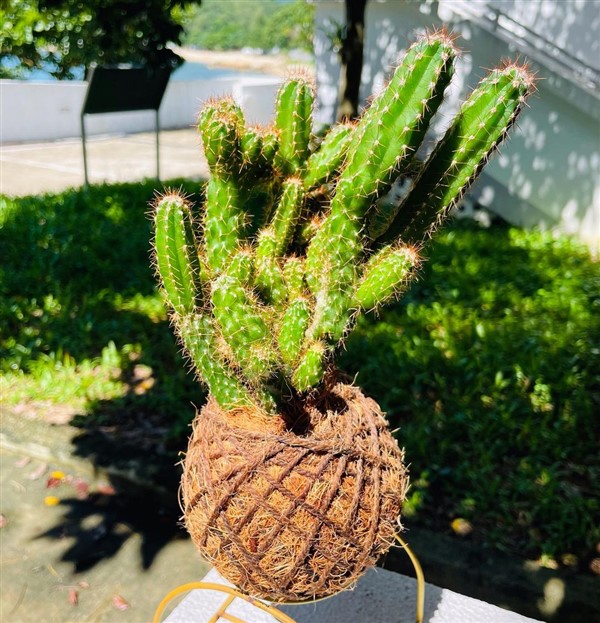
- A plant that you like. However, when choosing a plant for your Kokedama, preferably, pick a plant that does not want full sunlight. Because moss prefers a shaded environment. A plant with small roots also works best.
- Akadama soil. It is a type of soil that contains peat moss to retain moisture. You can get bonsai soil or make your own soil mix with clay and peat moss for the base of Kokedama.
- Sheet moss
- Twine or string
- Scissors
- Water
- A spray bottle
- Gloves
- A bucket
- A plastic bag
- Newspaper or a tarp (to protect your work surface)

Instructions
#1. Prepare your plants for Kokedama
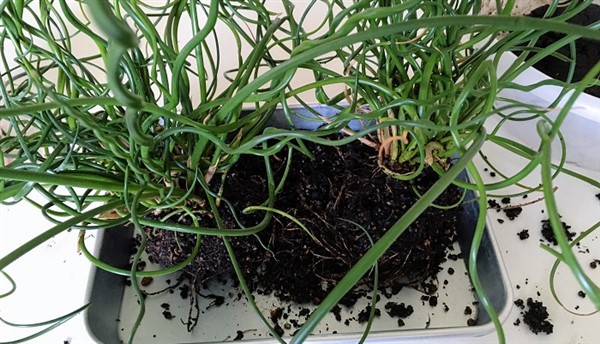
Whether you are using potted plants or outdoor plants for your ball, you have to pull the plants out by their roots, take the plant out of the pot or the ground. Wear your gloves and remove the soil from around the roots with your fingers and then rinsing them in the sink. Do not forget to use a newspaper or a tarp where you work!
Pro tip: Always inspect the leaves of a plant that you brought in from the outdoors for bugs and other pests before bringing it inside.

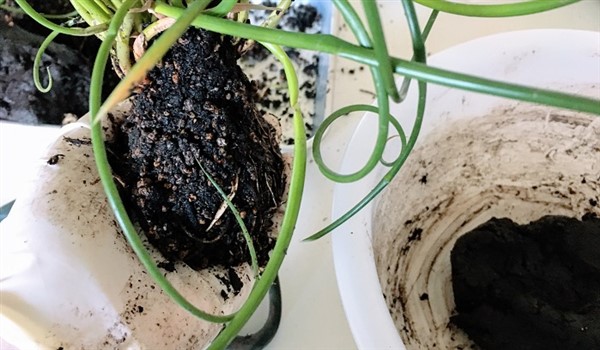
#2. Making the Mix
Take a bucket and a plastic grocery bag. Put some gloves on because your hands are going to get dirtier for this part! For your Kokedama; mix the bonsai soil, peat moss, and clay in a ratio of 70 percent bonsai soil to 30 percent peat moss-clay mixture. Wet the mixture to ensure that all of the ingredients are bonded together.

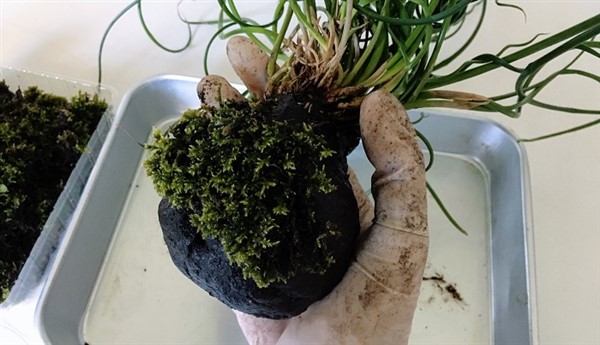
#3. Creating the Ball
Then, take a hand full of the mixture and roll it into a thick, hardball using your hands. For your moss ball to thrive, you will need to create soil that won’t fall apart but isn’t so compacted that the plant roots can’t breathe. Make a ball large enough to entirely cover the roots of a plant.

#4. Planting the Plant
Next, dig a small hole in the center of the soil ball with your thumbs. Brush off any extra soil before nestling the plant roots into the hole and molding the soil around them. Use the sheet moss to cover the ball, carefully pressing portions of moss into the soil. Don’t worry if it doesn’t stay in place right away; wrapping it with twine or a string will help. Before sealing with a knot, you can wrap the ball with twine, making sure to cover all sides, the bottom of the ball as well. Your Kokedama should be able to be lifted and moved without spilling dirt or moss.

#5. Final touch
After that, cut another long length of string and attach it to both sides of the Kokedama to hang it up. Mist it with water and hang it in a somewhat shady area. Soak your moss ball plants in a dish of room temperature water for 10 minutes before watering. Rehang the plants after draining the soil ball in a strainer until it stops dripping. When the leaves turn brown and the Kokedama feels light, it’s time to water it.
You can mist it daily and trim the dead leaves on a regular basis. Keep an eye on your plants! Remove any dead or brown leaves with a pair of scissors or plant sheers as soon as you detect them. Do not forget that the brown leaves that appear on a regular basis indicate that your plants aren’t getting enough water!
Also, as a side note, the roots of the plants will begin to poke through the moss and soil balls as they grow. When that happens, it means that you need to repot them with new balls. However, this is only essential once or twice a year for most plants. That’s it! It is way easier than it looks, don’t you think? You now have your first very own Kokedama, and you can experiment with different forms and types of moss next time! Enjoy the beautiful Kokedama that offers you to see a piece of the natural world in that little sphere.


Great ideas